Intercept User
The call intercept user feature allows an administrator to gracefully take a user’s phone out of service while providing callers with informative announcements and alternative routing options. Depending on the service configuration, none, some, or all incoming calls to the specified user are intercepted. Also depending on the service configuration; outgoing calls are intercepted or rerouted to another location.
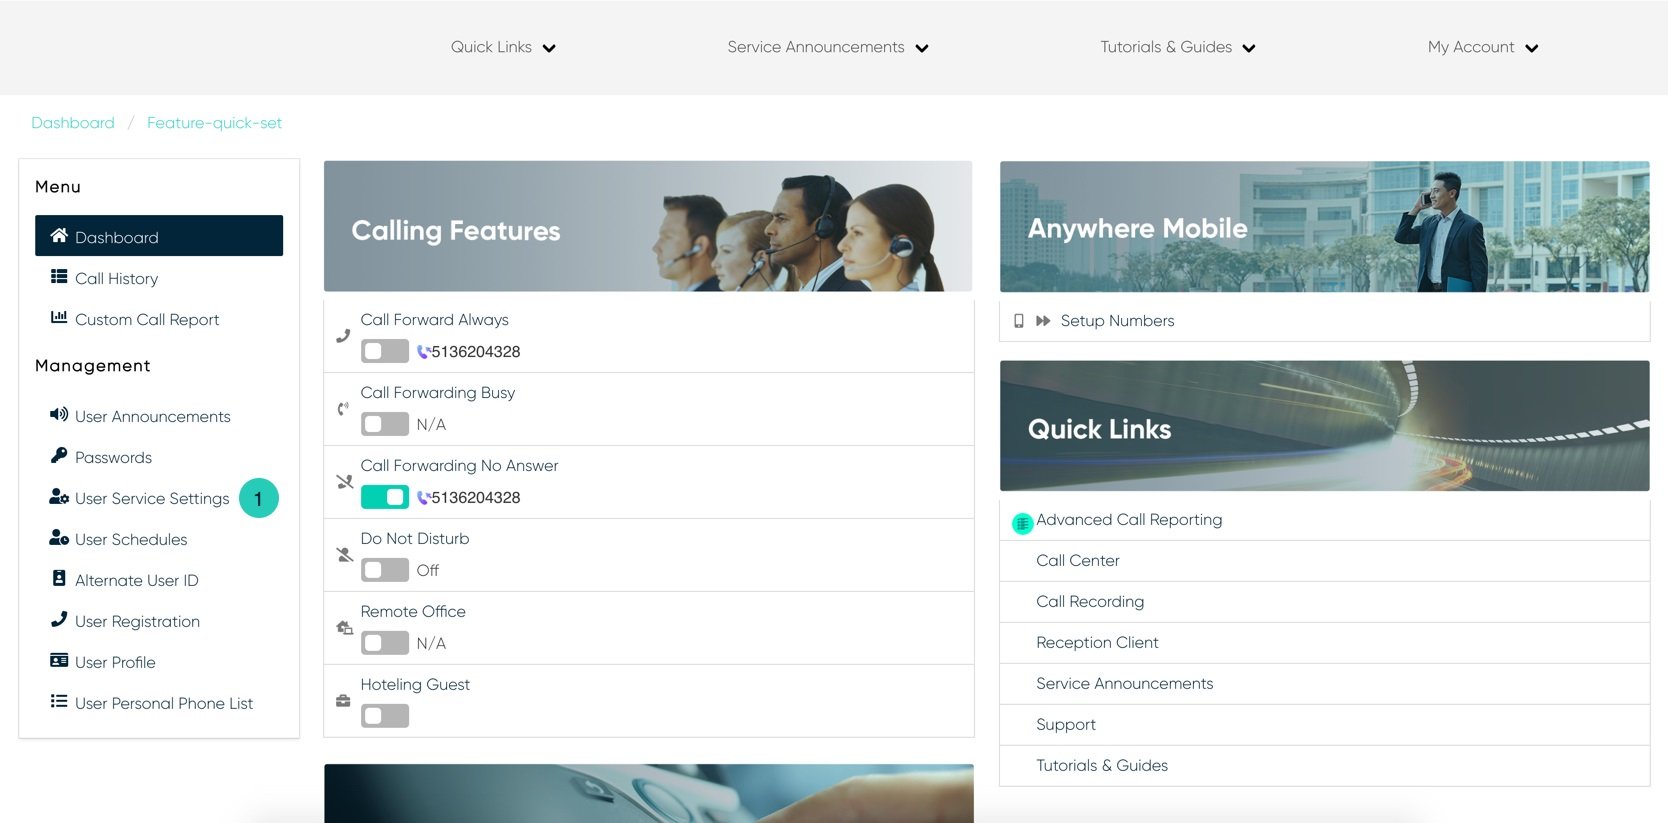
- From the user dashboard, locate and click on User Service Settings.

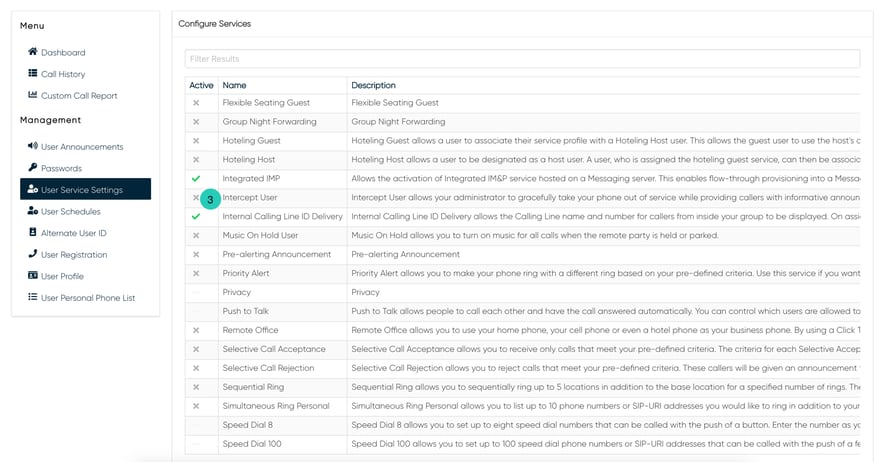
- The Services page will appear.
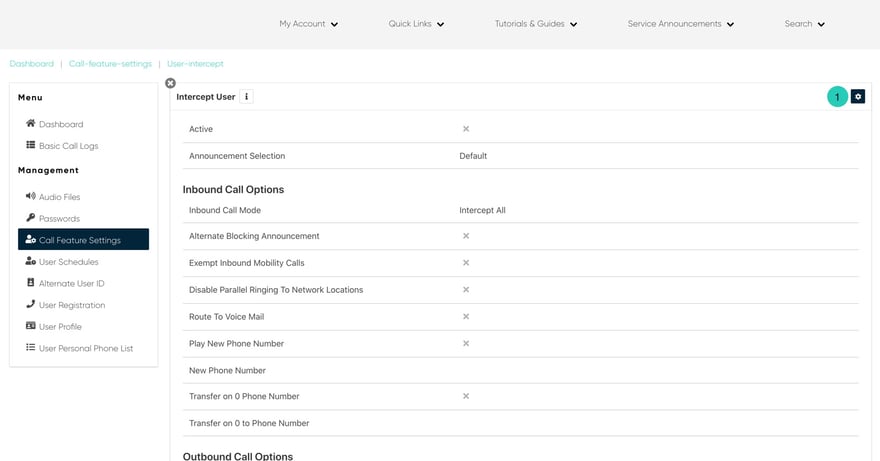
- Proceed to locate and click on Intercept User. This will give you access to the Intercept User configuration page.

To Configure Intercept User:
- Click on the Settings icon within the Intercept User table.

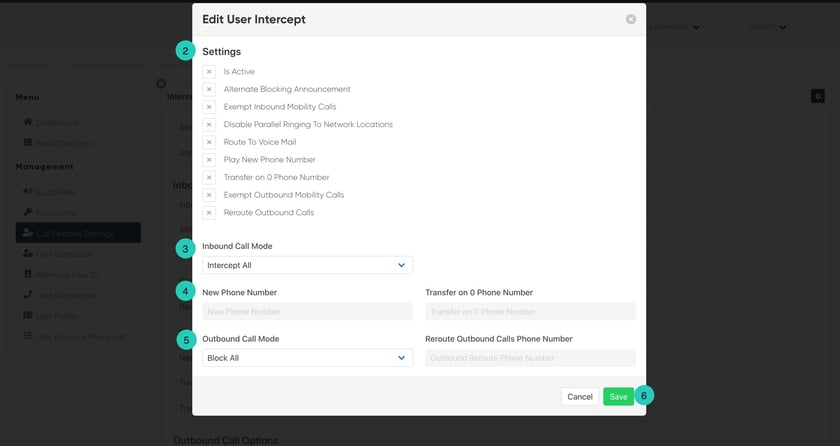
- Next under the Settings option, configure the settings you wish to utilize by enabling the feature by checking the checkbox next to each corresponding feature setting.
- Choose one of the following options for the user’s inbound call mode:
- Intercept all incoming calls – When this is enabled, all calls to the user will be intercepted and routed, as defined.
- Allow all incoming calls – When this is selected, the user can continue to receive calls, but the user cannot make outgoing calls. When making an outgoing call, the user will hear a message that their service has been temporarily blocked.

4. Proceed to enter a New Phone Number. This option will play the configured announcement (either default or custom) and then announce the new number entered here. Then enter the Transfer to ‘0’ Phone Number. This allows the user to receive inbound calls but blocks outbound calls. When the user tries to make an outbound call to any number, the call is blocked.
5. Finally, choose the options for the user’s outgoing calls:
-
- Intercept all outgoing calls – All outbound calls are blocked. A system default message is played indicating calls cannot be made.
- Allow only local outgoing calls – The user can make only local calls and calls to other users within their organization.
6. When complete, click the Save button to confirm changes.

